Wood Looking Tile Installation
Disclosure:
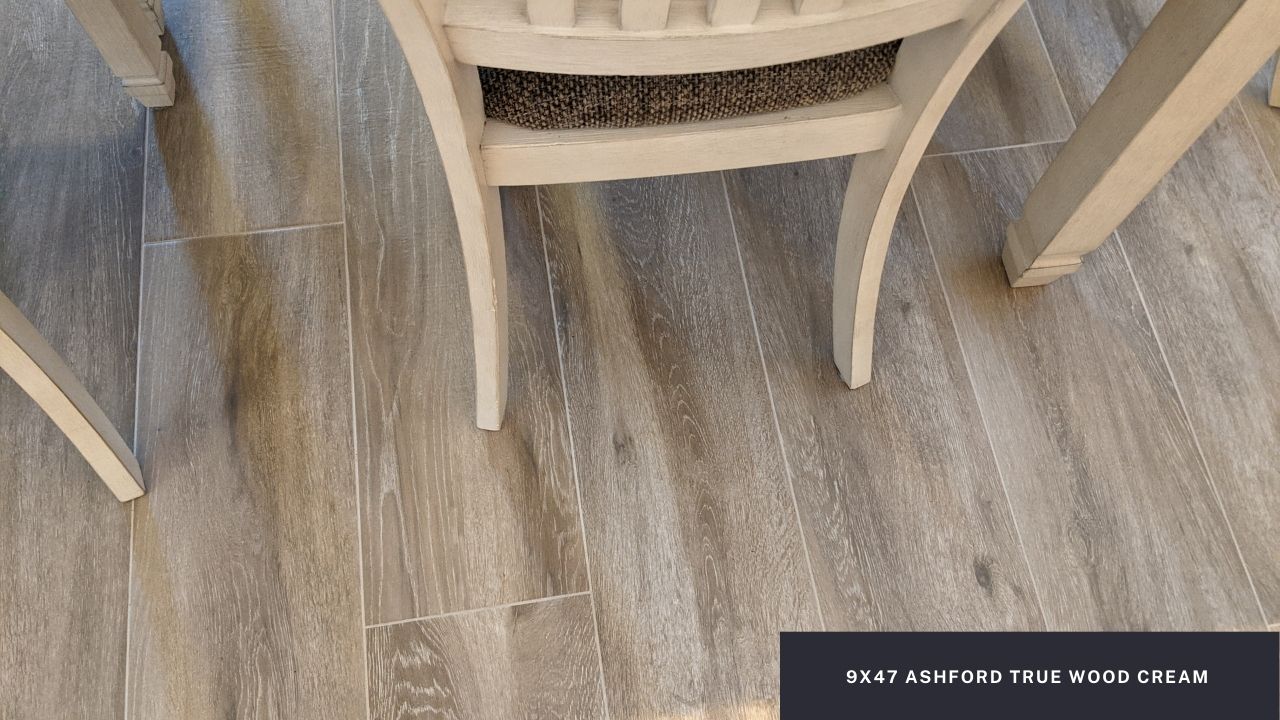
Welcome and thanks for your interest in our latest wood looking tile installation using 9x47 Ashford True Wood Cream porcelain tile.

We recently had the opportunity to help a customer install these nice wood looking tile in his home. We remove the existing tile in the kitchen breakfast area, remove the carpet and pad in the family room and engineered wood flooring in the entry, living and dining area.
You are looking at the Ashford True Wood Cream porcelain tile, which is a very popular style. It features a wood grain design with a cream background and it has an ultra-low sheen for easy cleaning.
This video will help you understand all the benefits of this style.
Wood Looking Tile Installation
Wood looking tile is a popular flooring option that offers the beauty of hardwood floors with the durability and low maintenance of tile. Installing wood looking tile can be a great way to update your home's flooring and give it a fresh, modern look. However, it's important to ensure that the installation is done correctly to ensure the longevity and durability of the flooring. In this article, we'll discuss the steps involved in installing wood looking tile and provide some tips to help you achieve a professional-looking finish.
Preparation
The first step in installing wood looking tile is to prepare the surface. This involves removing any existing flooring and ensuring that the subfloor is clean, level, and free of any debris. If the subfloor is not level, it will need to be leveled using a self-leveling compound. It's also important to ensure that the subfloor is dry and free of any moisture, as this can cause the tile to warp or buckle over time.
Once the subfloor is prepared, you'll need to measure the room to determine how much tile you'll need. It's a good idea to purchase an extra 10% of tile to account for any cuts or mistakes during the installation process.
Installation
The next step is to lay out the tile. This involves determining the center of the room and laying out a grid using chalk lines. This will help ensure that the tile is laid out evenly and symmetrically. It's important to take your time during this step to ensure that the tile is laid out correctly.
Once the tile is laid out, you can begin the installation process. Start by spreading a layer of thin-set mortar onto the subfloor using a notched trowel. Be sure to work in small sections to ensure that the mortar doesn't dry out before you have a chance to lay the tile.
Next, lay the tile onto the mortar, pressing it firmly into place. Use tile spacers to ensure that the tiles are evenly spaced and aligned. Continue laying the tile in small sections, spreading mortar and laying tile until the entire floor is covered.
Once the tile is laid, allow it to dry for at least 24 hours before grouting. This will ensure that the mortar has had a chance to fully cure and set.
Grouting
The final step in installing wood looking tile is to grout the joints between the tiles. Start by mixing the grout according to the manufacturer's instructions. Use a rubber float to spread the grout over the tiles, working it into the joints. Be sure to remove any excess grout from the surface of the tiles using a damp sponge.
Allow the grout to dry for at least 24 hours before walking on the floor. Once the grout is dry, you can seal the tile to protect it from stains and moisture.
Conclusion
Installing wood looking tile can be a great way to update your home's flooring and give it a fresh, modern look. However, it's important to ensure that the installation is done correctly to ensure the longevity and durability of the flooring. By following these steps and taking your time, you can achieve a professional-looking finish that will last for years to come.
Disclosure: